""

Xcelsius in BI on Demand (BIOD)

In this blog article I am going to talk about Xcelsius in SAP BI On Demand (BIOD). What I am going to explain are the steps that you should follow to upload an existing Xcelsius Dashboard to the BIOD system. 

What is BIOD?

First of all, for those who don’t know what is BIOD I will give a brief explanation. Basically we can say that BIOD is the most complete and approachable cloud based business intelligence suite available in the market today. BIOD is software as a service; you do not need to install any software on your machines to get instant value from the system. All you need to do is Log in and provide some data. It is a cheap BI solution, due to the fact that you don’t need to make a huge investment in hardware, licenses, etc... everything is in the net.  The target for this technology is small companies, which are less likely to be able to acquire a BI system due to the costs, but with BIOD they have an accesible  way into SAP BusinessObjects analysis system. In BIOD you are able to create:

  • Xcelisus Dashboards
  • Web Intelligente reports
  • Explorador

You can get more information about BI On Demand here.

 Now, let´s see how to upload an existing XCelsius Dashboard to the BIOD system.

How to upload an Xcelsius Dashboard to BIOD?

First of all, if you don’t have a BIOD account you should create it. It s free, and with it you will able to test most of the features of this cloud system. Click here to Sign up.

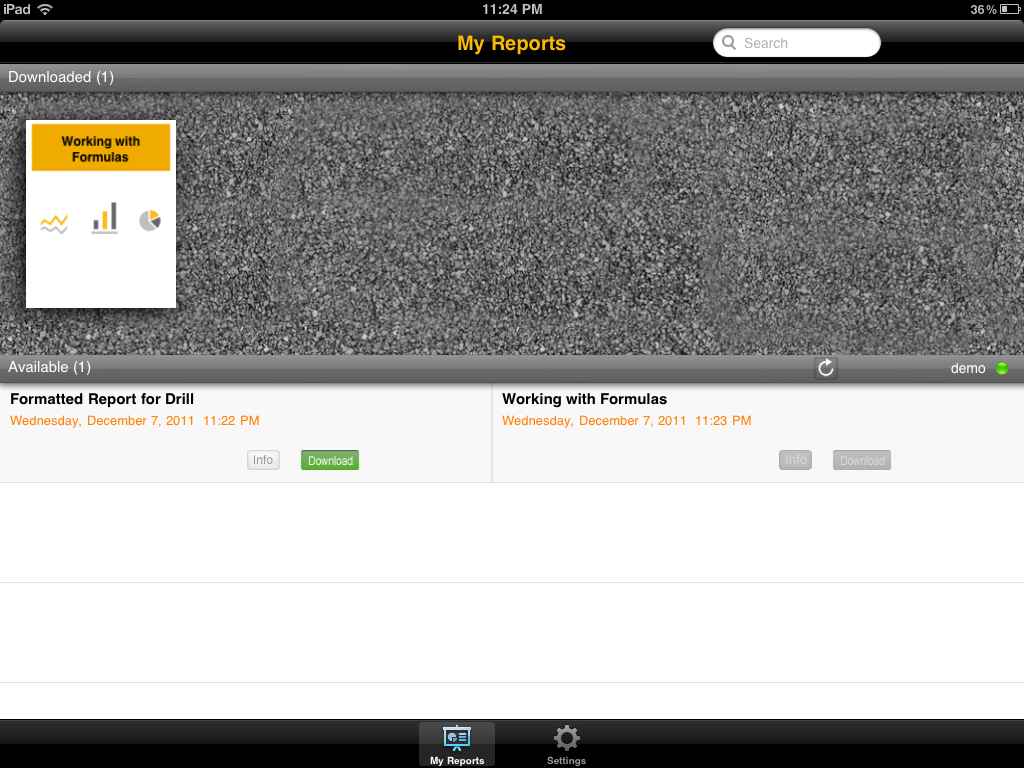
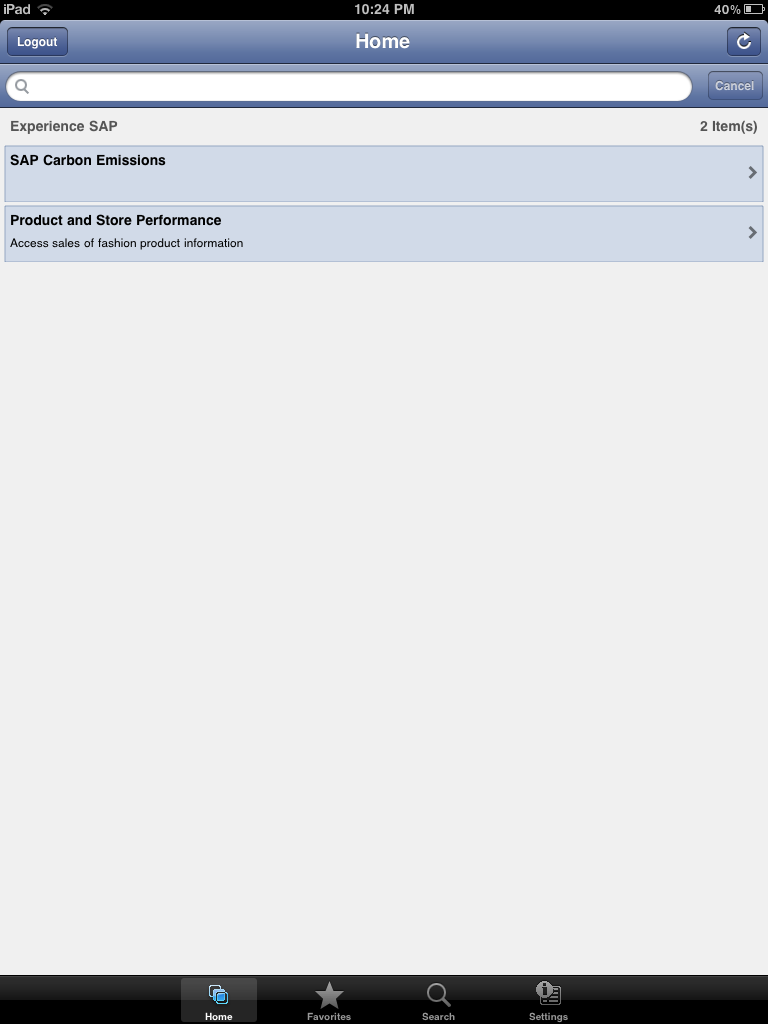
Once we are logged, we will see this screen.

Now I want to show you how you should upload an existing Xcelsius file with static data to the BIOD system.

First of all we should create the DataSource, so in my Stuff panel we should select Datasets. After that we click Add New Button  -> Add Dataset

Then we should chose from which place we will select the dataset. We have several options: Create From Query (this option is only available in the BIOD Advanced version, where the connection to a universe is possible), bring data from salesforce or create an empty dataset from scratch and finally, we can upload a file (xls,xlsx or csv) which we will use in this example.

As I said before, we select an excel file as source of our dataset, in the first row of our excel file it is important to have the labels of each column. We can also edit this dataset, change the value type of each column, the label name, etc...

At the bottom of this page we can find the properties section, here we should enable the Web service. Once we have done this, the system will generate a url that will be the reference to the dataset in our dashboard.

The next step will be to upload the Xcelsius file as a template, so we select Add New -> Add Template.

We create a name for this template, uncheck the Create a new Xcelsius file check box and finally, select the xlf file that we have locally.

The screen below will then appear. In order to connect the dataset to our xlf file we should select the blue sentence (you may click here to edit the Xcelsius file). You can also attach an image of the dashboard as a thumbail for repository. The object selection will be fancier.

Once the Xcelsius editor is opened we add a connection using OnDemand -> Add Connection menu option. This will create one Flash Variables connection ([Flashvar]) and two Web Service Connections ([OD_Data1 and OD_Data2). In our case we should delete one data connection because we only have one source, but in case we need more data sources we can create as many as we want. It will also create a new tab in the XC spreadsheet that contains these cell bindings.

After that we configure the data connections. Open the Data Manager (Data -> Connections) and you will see a Connection of type FlashVars.  You should see the following:

  • get_data_url: (mandatory). This should be bound to the cell which the Web Service Url of the Web Service Connections are also bound to. If you have multiple connections this should be bound to the range which holds those connections.

Then each Web Service Connection (OD_DataN), in our case only OD_Data1 points to the set of cells to which that connection outputs its data.

These are the next steps that you should follow in order to setup the dashboard:

  • Click on My Datasets and click copy beside the dataset OD_Data1.
  • Paste the url from dataset to the WSDL URL input box of a Web Service connection

  • Click Import to import the schema.
  • Bind the web service url to the same cell as get data url (Note: if you used the Add Connection process this should already be done).
  • Bind the headers and the row values.
  • Set Refresh on Load to be true.

After these steps you can save your changes and then click the Back button to go back to Edit Connection step of creating a template. You should see your connection listed on the screen.

Click Next to go to the Edit Sample Data step, you can choose to add in your sample data from the XLF if you like, and then click Finish.

Finally we will create a visualization using this template. We select our Data Input, in this case Data Source.


If we go to the visualization menu we can find the object.


In conclusion we can say that the BIOD system is a nice tool to start testing the power of the SAP solutions without a potential heavy investment at the beginning. It can be also a good tool to make demos on and show our dashboards to customers. It is very interesting to test the explorer tool, you can see the amount of options that the BIOD brings you in terms of data analysis.  If you are interested in the advanced solution you should get in touch with SAP.

If you have any comment or doubts do not hesitate to contact us or leave a comment below.

Abordar el dilema de la conciencia agregada

In my last project I faced a situation where the customer asked me about the best option for a particular topic and this time my answer had to be "it depends". As a consultant, my duty was to provide two different options (with their corresponding pros and cons) but I could not make a decision on this, since the answer was highly dependent on the composition of IT service providers in different areas and also their road map. In general BI terms, we could define aggregation as the process of summarizing information at a certain level of detail in order to improve the performance. The Kimball Group defines Aggregate Navigation as the ability to use the right aggregated information and recommends to design an architecture with services that hide this complexity from the end user. In the BusinessObjects world the same concept is called Aggregate Awareness and the database administrators community usually refers to it as query re-write.

En SAP BusinessObjects, esto se puede lograr mediante el uso de la función @aggregate_aware, contextos y objetos incompatibles en el diseñador de universo. En un nivel de base de datos (RDBMS), ciertos proveedores proporcionan esta característica a través de vistas materializadas con opción de reescritura de consulta (Oracle, Sybase, DB2, Informix, PostgreSQL y algunos otros).

Así que aquí tenemos el dilema: ¿dónde colocar esta lógica en un entorno de cliente: en la capa física o en la capa lógica?

Ambas opciones son válidas, pero hay algunas consideraciones que deben tenerse en cuenta desde diferentes puntos de vista:

Comparación de tablas

La información que se ve en la tabla anterior ya puede ser interpretada, pero como resumen, mi recomendación sería:

Implementación de la conciencia agregada en SAP Business Objects:

  • Ideal para una arquitectura con muchas fuentes de base de datos (no todas las fuentes de base de datos admiten la característica de reescritura de la consulta y debe mantenerse en cada una de ellas)
  • Es bueno tener si el proveedor de la base de datos puede ser cambiado en el futuro (no hay cambios necesarios en el universo)
  • No hay acceso a administradores de base de datos que puedan ajustar correctamente la base de datos
  • Arquitectura de informes cerrada basada en una capa semántica fuerte en Business Objects
  • Existe la necesidad de un repositorio centralizado de metadatos

Implementación de mecanismos de reescritura de consultas en el RDBMS:

  • Ideal para una arquitectura con muchas herramientas de informes que acceden a la misma base de datos
  • Acceso a administradores de bases de datos sólidos
  • Simplifica el diseño del universo
  • No es necesario un repositorio centralizado de datos

If after reading this post you still have doubts on what direction to go for at your company or customer, do not hesitate to contact clariba at info@clariba.com or leave a comment below.

SAP BusinessObjects Explorer 3.2: Creating Row-Level Security

In the past few months I had the chance to implement a solution based on the combination of SAP BusinessObjects Explorer and mobile devices. The challenge was: “I want to explore the same information that I see on my dashboards with SAP BusinessObjects Explorer on my iPad. In this particular case, some of the customer`s dashboards were really complex and we had to deal with many issues. Today I would like to share with you how we solved one of these issues:

How to implement row-level security into a space of Explorer?

The solution to this challenge cannot be based in any case of security implemented at universe level, in SAP BO Explorer the information of the spaces is retrieved when we index the space, this means that any kind of security applied at universe level will have a direct impact when we index the space. What we needed was a space with all the information but able to be filtered on demand based in some personalization rules.

With SAP BO Explorer 3.2 we are able to generate and apply this kind of security by creating two spaces: one reference space with all the possible information to explore and one personalized, where we will be able to filter the information displayed on demand based on the rules of personalization and making use of the reference space.

Definition of the scenario

To be able to follow the implementation of the solution, assume that we start from:

  • SAP BusinessObjects XI 3.1 installed and fully operational
  • SAP BusinessObjects Explorer 3.2 installed and fully operational

To make it easy to follow I will make use of the eFashion universe and we will need to create users in BO according with the list of values of Name of Manager dimension (Store -> Store Details->Name of manager).Note that the name of the users should be exactly the same as the values of the dimension.

We will create a new space based on the eFashion universe information. The personalization rule is that the Store managers will have access to the space but they will only be able to see the information related to their Store(s).

Creating the e-Fashion Reference space

First open SAP BO Explorer and login with administrator credentials. Click in Manage Spaces, select e-Fashion Universe and press New

In the tab Properties introduce a Name, in our case eFashion Ref, and select a folder under Public Folders, for the example Public Folders -> Explorer Spaces

The users should not be able to access this space, so remember to uncheck the option Show on Home Page

In the tab Objects select the objects that we will use in the space, in the example this tab will look like this

Then click Validate the space and then OK to save the space

Now you will have to Index the space, to do this just press the Index buttonOnce the status check shows the following symbol the space is successfully indexed.

Creating e-Fashion Personalized Space

Now we will implement the space to be accessed by the users, in this space we will make use of the eFashion Reference space created before to build a space with the personalization rules defined.

Log in with Administration rights into SAP BO Explorer, go to Manage Spaces, select the eFashion universe and press New. In the tab Properties introduce a Name, in our case eFashion Pers, and select a folder under Public Folder, for the example Public Folder -> Explorer Spaces

Select the same objects that we have used to create the eFashion Ref espacio

Go to tab Personalization, check Personalize information space Exploration and Select the eFashion Ref space from the list Select an information space

Now select Usuario, from the table To Filter, and select Name of the Manager in the drop-down list in the column Filtered By.

We will link the rest of the dimensions of the personalized space with their corresponding ones on the reference space. The Personalization tab should finally look like this:

Validate the space and press Ok to save it and Index the new space eFashion Pers

Security Topics

Before testing the solution, and to avoid strange behaviors of the SAP BO Explorer spaces, we will have to review the security applied to the different components involved in SAP BusinessObjects. To “make our lives easier” I suggest creating a User Group (i.e. Explorer Users) in SAP BO and I strongly recommend reviewing this list of topics to ensure that the group has:

  • Granted access to Explorer application
  • Granted access to the Universe
  • Granted access to the Connection used on the universe
  • Granted access to the folder where the spaces will be stored.

In this example, what I did was to grant View On Demand access to all of the items of the list.

Finally the solution is ready to test!

Testing the solution

Log on in SAP BO Explorer with one of the users we have created, i.e. Quinn, from the Home tab we will access the eFashion Pers space and see only the data belonging to manager Quinn

If you log on with another user created, i.e. Steve, from the Home tab we will access the eFashion Pers space and see only the data that belongs to Steve

I hope you found this article interesting. For any queries regarding the contents of this article please leave a comment and I will readily reply.

SAP BusinessObjects Mobility Solutions (Parte 2 - SAP BI Mobile)

This is the second article of the SAP Mobility Solution series.  It is time to review the second Mobile application that has been release by SAP Business Objects: SAP BI Mobile

If you have not  read the first article on SAP Explorer yet, check it out.

Just as a brief reminder that both this and the previous tool can be downloaded (if you are an SAP partner) through SAP Marketplace

If you are not an SAP partner but still feel like trying these tools you can still download the mobile applications from the app store and try out the demo servers SAP has made available.

Now let’s start reviewing the second Mobile tool from SAP Business Objects

SAP BI Mobile

The SAP BI Mobile application allows WebI and Crystal reports to be displayed and distributed through Mobile devices. The application we will review here is the Ipad version but other mobile devices are also supported. The Ipad version of this application can only be installed if you have Business Objects XI 3.1 SP3 or higher, so be prepared to patch your system if it is not at this level.

Click Here to find a complete overview of this application.

The first step to get this application running is to install the server side of the software. To do so you need to download two files from the SAP Marketplace: the BI Mobile 3.1 SP3 file and also the BI Mobile SP4 (required for Ipad support)

Instalación

The installation is also straightforward and you should only modify the default settings of the install if your Business Objects system configuration requires it.

For example, if you have a web server separated from the application server then you will have to install those two sides separately (Custom Install). In our example, since all the components are on the same machine we will install all the software on the same place (Complete Install).

You can see in the screen below how components are separated in the install process.

Once you run through the install for the BI Mobile SP3, you will also need to install SP4. This patch installation does not require any configuration and will only write the patched files on the home business objects directory.

After these two installations are complete you will notice new applications are installed on the server components of you Business Objects system.

Run both of the Configure as a service options (only on windows install) so you can also have the BI Mobile components available as services under windows.

Make sure your new Mobile services are started and remember to set them to start automatically in case they need to remain ON along with the Business Objects system.

Deploying Web Components

The web part of the BI Mobile application has also been generated during installation but for some reason they are not automatically deployed (at least in our test cases). Therefore you will need to move them yourself to the Tomcat webapps directory so they are deployed.

Browse to the following directory: $BOBJ_Home/Business Objects 12.0/java/

Locate the following files:

  • MobileBIService.war
  • MobileOTA.war
  • MOBIServer.war

Copy these files to the webapps directory located at: $BOBJ_Home/Tomcat55/webapps

When the .war files are copied to this directory they will be automatically picked up by Tomcat and new directory apps will be created. If the deployment is successful you should be able to access the Mobile default web page at:

http://yourserver:8080/MobileOTA

If a webpage comes on with options for different mobile devices, we are now ready to install/configure the mobile application on the ipad.

La aplicación móvil

First off, we need to download the application from the App Store. You would find it under the name SAP BI Mobile (do not confuse with Mobile One app)

Once downloaded, it is time to configure the settings for a new Mobile connection.  Start the app on the Ipad and click on the Settings option at the bottom.

Select the "add a connection" option where you will have to provide the following:

  • Nombre de la conexión
  • Server URL. This is the name:port of the machine where the BI Mobile web component has been installed (without http in front)
  • The CMS name that controls the BI Mobile server components
  • The Authentication method
  • Nombre de usuario y contraseña

Save the configuration and select the newly created connection.

If the connection is successful we will face the following screen on the Ipad application.

The connection to the mobile server has been successful but we have no reports to show yet. To make new reports available to the mobile application we will have to tag them as mobile compatible. This is done by adding the reports to a category called Mobile. This category can be customized as desired but for this example we will use the default value.

Select the reports we want to make available on the BI Mobile application and categorize them as Mobile.

NOTE: In most cases the category does not previously exist and you might need to create it prior to this step.

Almost immediately after this is done, you will see the categorized reports appear on the lower part of the BI Mobile application.  The reports are now ready to be downloaded to the Ipad.

Click on the green download button that appears next to each report.

When the download is completed the downloaded report will appear on the upper part of the BI Mobile application. We can now click on the report on the upper part and you will find the Mobile version of your WebI/Crystal report.

Be aware that not all WebI capabilities are supported by the BI Mobile version. To understand the limitations you can review the product guide here

On the same document we can also find some useful best practices on how to design a WebI/Crystal report for Mobile viewing and templates that can help you when designing new reports according to mobile devices´ size.

Although the variety of graphs and interaction in the BI Mobile application is still quite basic, we think SAP is in definitely on the right track.

Appendix on Business Objects XI 4.0

Although our example reviews version 3.1 of the Mobile application we also advise to review the guide for release 4.0 as it contains additional features on the BI Mobile application. The additional features include in-table graphics such as percentage bars or sparkline trends. See screenshot below:


Conclusion on SAP BusinessObjects Mobility Solutions

This is a promising start. Chances are that  soon SAP will extend the devices covered, support more complex graphs and take better advantage of the Ipad interaction capabilities as well.

With mobile solutions you will be able to optimize your existing investment by bringing your content to more mediums, you will be able to provide instant answers to more people, no matter where they are working from, therefore, you will boost the performace of your organization. All bets are on mobility!


Si está interesado o ha trabajado con esta aplicación, o si cree que podría ser útil en su organización, por favor deje un comentario a continuación.

Clariba y SAP MENA Le invitamos a asistir a nuestro Webinar de Finanzas Central (Serie de Webinar de MENA BI)

SAP MENA y Clariba le invitamos a asistir a nuestro seminario web de Finanzas Central el lunes, de 14:00 a 15:00 (hora local de los Emiratos Árabes Unidos) para conocer más sobre los beneficios de nuestro solución. (Presentado en inglés)

To Register for the Webinar CLICK HERE

Abrimos oficialmente nuestra serie de seminarios Web de MENA BI con el primer seminario web sobre Clariba Finance Central, una solución interactiva y fácil de usar que centraliza toda la información financiera en un solo panel de control, permitiendo un análisis extenso en un formato muy visual. El CFO. Con esta única versión de la verdad, su departamento de finanzas puede visualizar todos los KPI financieros relevantes y realizar comparaciones fáciles con presupuestos y objetivos de rendimiento.

La solución se desarrolló utilizando la tecnología SAP BusinessObjects BI líder y se puede integrar con cualquier fuente de datos y adaptarse a cualquier industria. Además, se puede incorporar a los dispositivos de Microsoft Office y móviles de su empresa, lo que permite un fácil acceso a datos históricos y actuales.

El seminario tendrá el siguiente Programa:

  • Bienvenida e Introducción por SAP MENA
  • Clariba Finanzas Central:
    • Retos de los departamentos de finanzas
    • Beneficios de nuestra solución
    • Demostración interactiva
  • Presentación de SAP BusinessObjects suite por SAP MENA
  • Q & A

To Register for the Webinar CLICK HERE

For more information about our SAP BusinessObjects solutions for Finance Departments, visit our web site to view a demo video about Clariba Finance Central: Click Here Atentamente, Xavier Marigó Clariba Sales Manager MENA


SAP BusinessObjects Mobility Solutions (Parte 1 - SAP Explorer)

Como ya habrás notado, vivimos en un mundo móvil. El uso creciente de dispositivos móviles para las tareas cotidianas se ha convertido en un lugar común en el transcurso de la última década. La inteligencia de negocios no se ha quedado atrás en esta tendencia. En esta serie de dos publicaciones de blog sobre soluciones de movilidad de SAP Business Objects, analizaremos las aplicaciones móviles que SAP Business Objects ha puesto a disposición para llevar BI a dispositivos móviles (más concretamente al Ipad): SAP Explorer y SAP BI Mobile.

A través de este análisis aprenderemos cuál es el proceso para instalar las aplicaciones y revisar algunas cosas importantes que debemos considerar. Nos centraremos sólo en su pieza de movilidad (Explorer, por ejemplo, también se puede acceder a dispositivos no móviles) y también revisaremos algunos detalles de la instalación del lado del servidor para cada herramienta.

Both of these tools can be downloaded through SAP Marketplace (if you are an SAP partner).

Si usted no es un socio de SAP pero siente como probar estas herramientas, puede descargar las aplicaciones móviles de la tienda de aplicaciones y probar los servidores de demostración que SAP ha puesto a disposición.

En primer lugar, vamos a darle algunos detalles sobre nuestro entorno de prueba y el software que se instaló en él.

Software:

Business Objects XI 3.1 SP3 Enterprise

  • Sql server 2005

  • Explorador SAP 3.2

  • BI Mobile 3.1 SP4

Hardware (Máquina Virtual):

  • Servidor de ventanas 2003

  • 4 GB RAM

  • 2 procesadores

  • Disco duro de 30 GB

Con la configuración anterior dispuesta vamos a empezar con nuestra primera herramienta móvil de SAP Business Objects.

Explorador SAP

Esta es la primera herramienta de SAP basada en la tecnología en memoria. Está dirigido a usuarios ocasionales que requieren un marco de trabajo ágil y preconstruido para la generación de informes pero que todavía les permite filtrar y buscar datos intuitivamente. Se lanzó inicialmente como una aplicación web sólo, pero las características mencionadas lo convierten en un candidato obvio para dispositivos móviles, por lo que la aplicación móvil salió poco después.

Una vez que haya descargado los archivos del instalador de SAP Marketplace, es hora de instalarlo en nuestro entorno de Business Objects.

Instalación

La instalación de SAP Explorer es bastante sencilla. Usted encontrará que hay muy pocas pantallas que tenemos que prestar mucha atención y estos son los que se centrará en este post.

Debería instalar la aplicación y los componentes del servidor web juntos o separados, dependiendo de la configuración del sistema. En nuestro ejemplo instalaremos todo el producto en una sola máquina.

Para los entornos en los que el servidor web no se encuentra en la misma máquina, tendrá que instalar independientemente el componente de servidor de aplicaciones web en la lista anterior. Sin embargo, también es posible instalar, por ejemplo, el servidor de indexación en una máquina separada para optimizar la eficiencia. El servidor de índices es el encargado de generar el espacio y puede requerir una gran carga de procesamiento dependiendo de su configuración.

Las credenciales del administrador serán necesarias durante la instalación, así que asegúrese de tenerlas a mano, así como el nombre y el puerto del CMS.

Finalmente se pedirá el nombre del nodo. Esto se utiliza para identificar la instalación en la configuración del explorador múltiple / paralelo. Por ejemplo, para vincular un servidor de indexación aislado a su servidor maestro. En nuestro caso dejaremos el nombre del nodo con el nombre por defecto (que en este caso es el nombre del equipo) ya que toda nuestra instalación reside en el mismo lugar.

Once the installation is complete we can test it by accessing the following url: http://yourserver:8080/polestar

Si todo está configurado correctamente verá la pantalla de inicio de sesión para el Explorador.

NOTE: If you would like to review the installation process in more detail it is best to review the Installation Guide also available in the SAP Marketplace.

Creación y configuración de un espacio

El siguiente paso es crear un espacio. El espacio es el dato indexado que el Explorador construye basado en un Universo o Archivo. Para construirlo, tendremos que hacer lo siguiente:

  • Iniciar sesión en SAP explorer

  • Haga clic en la opción Administrar espacios

  • Seleccione un universo

  • Seleccione Nuevo

Proporcionar la información necesaria para construir el espacio. Necesitaremos proporcionar al menos:

  • Nombre del espacio

  • Ubicación de almacenamiento

  • Las dimensiones y hechos que se computarán en el espacio

Una vez que el espacio se ha configurado ahora necesitamos indexarlo. Este proceso se puede ejecutar bajo demanda o se puede programar, como un evento único o recurrente. Dependiendo del tamaño de los datos seleccionados de su universo, este proceso puede tardar de minutos a horas, así que tenga en cuenta esto antes de que las consultas de ejecución larga estén configuradas para crear un espacio. Una vez que el espacio haya terminado de indexar sus datos, se marcará con un cheque verde.

Ahora podemos conectar nuestro dispositivo móvil al espacio!

La aplicación móvil

Antes de conectar tu dispositivo, primero debemos descargar la aplicación desde la tienda de aplicaciones. Lo encontraremos bajo el nombre "SAP Explorer".

Una vez descargado necesitamos configurar una nueva conexión con los siguientes detalles:

  • Nombre de la conexión

  • Nombre del sistema CMS

  • Nombre de usuario (con permisos para utilizar Explorer)

  • Contraseña

  • Tipo de autenticación

No hay requisitos complejos en esta pantalla de configuración. Sólo asegúrese de proporcionar los datos correctos para cada componente (servidor web, cms, cms puerto, etc).

NOTE: the official SAP Explorer Mobile installation guide specifies that installing SAP BI Mobile servers is a requirement. In reality, this is only optional and by installing SAP Explorer server you should be able to access Explorer with your mobile device.

Ahora debe ser capaz de iniciar la conexión con el servidor Explorer y trabajar con el espacio creado antes. En este ejemplo usaremos la conexión de Experiencia de SAP que viene configurada por defecto en la aplicación de Ipad.

Si la conexión es correcta, debe encontrar la siguiente pantalla con todos los espacios disponibles:

Una vez que un espacio se selecciona de la lista que se enfrentan a una pantalla que se parece bastante similar a lo que has visto en la versión web de Explorer.

La versión móvil de SAP Explorer no tiene diferencias en las funcionalidades en contra es la versión basada en Web y sólo se han realizado cambios menores para adaptarse a la interacción táctil en el Ipad.

Como usted ha visto, instalar y preparar SAP Explorer Mobile es una obviedad. Ejecute el proceso de instalación y está configurado para comenzar a utilizar espacios y análisis en memoria en el Ipad.

A partir de ahora no hay otras aplicaciones lanzadas por SAP para otras plataformas móviles (es decir, Android). Algunos podrían decir que esto no es necesario debido a otras plataformas de apoyo de la tecnología flash, pero la capacidad de respuesta de la aplicación de Ipad definitivamente establece esta versión appart. Esperamos ver pronto aplicaciones dedicadas a otros dispositivos móviles.

La próxima aplicación móvil - SAP BI Mobile - se tratará en el siguiente artículo de la serie, que debería estar a principios de enero.

Si está interesado o ha trabajado con esta aplicación, o si cree que podría ser útil en su organización, por favor deje un comentario a continuación.

StreamWork - el entorno de trabajo colaborativo de SAP

Estamos notando que nuestros clientes y clientes potenciales están empezando a buscar modelos y flujos de trabajo colaborativos. La razón es que quieren fomentar y mejorar el trabajo en equipo y reducir los errores humanos mediante la creación de flujos de aprobación para sus tareas internas. Por lo tanto, si ayer los usuarios de poder o TI podría modificar directamente los valores de una base de datos sin ningún control, hoy en día, con un número creciente de empleados y un creciente nivel de complejidad para los procesos, prefieren los flujos de trabajo formales para impulsar la eficiencia y siempre garantizar la aprobación De la gestión, un modelo colaborativo que puede reducir o incluso eliminar los errores provenientes de la falta de control sobre las acciones.

SAP aún no tiene ningún motor de flujo de trabajo (o al menos no lo tenemos en cuenta), pero tenemos lo que SAP llama "Social Intelligence" herramienta, que se llama StreamWork.

Esta solución parece una mezcla entre Facebook, Twitter, LinkedIn y MS Outlook / Proyectos. He tomado algunas imágenes de la pantalla de impresión durante las pruebas que he hecho en uno de nuestros clientes, para que pueda ver lo que está disponible:


Los usuarios pueden crear tareas / actividades y agregar participantes;


Añade acciones a diferentes tareas;


Administrar alimentos y controlar lo que están siguiendo;


Establecer agendas y matrices RACI;


Definir configuración de notificaciones y obtener recordatorios de correo electrónico en su bandeja de entrada ...


... en pocas palabras: pueden colaborar mientras trabajan en un proyecto.

If you want to access a free version of StreamWork, please go to www.streamwork.com and sign in. Moreover, you can find a white paper attached sap_streamwork, where you can read what SAP says about it. In my opinion, a very interesting tool, worth checking it out.

Le invitamos a registrarse en nuestro webinar: control del tráfico de llamadas claras - el próximo 12 de diciembre

SAP y Clariba le invitan un registro en el segundo Webinar de Control del Tráfico de Llamadas para conocer más sobre los beneficios de implementar una solución de atención al cliente en tiempo real.

Visualización del centro de llamadas en tiempo real


Su Centro de Llamadas y de Atención al Cliente juega un papel importante en el proceso de venta e influye directamente en la experiencia del cliente. Cuando nos encontramos en un pico de llamadas, los clientes están insatisfechos y los directores de equipo necesitan poder asignar dinámicamente los agentes. También necesita encontrar la causa raíz de cualquier ineficiencia para marcar el camino adecuado, como la formación del personal o la gestión del proceso.

SAP y Clariba le invitan a registrarse en el siguiente Webinar de Control de Tráfico de Llamadas para conocer más sobre los beneficios de implementar una solución de atención al cliente de tiempo real. El primer seminario ha tenido mucho éxito por eso hemos decidido volver a presentarlo el 12 de Diciembre de 2011, de 11:00 - 12:00.

El Control de Tráfico de Llamadas de Clariba está basado en la tecnología BI BusinessObjects de SAP. Actúa en tiempo real y es la solución más atractiva que permite a los centros de llamadas y atención al cliente mostrar de forma autónoma los parámetros clave del tráfico de llamadas, las alertas de servicio y las tendencias de hasta 5 equipos simultáneamente en una única Pantalla Esto se puede mostrar en una gran variedad de dispositivos, desde las pantallas de gran formato en su oficina a los dispositivos móviles. Además, está totalmente automatizado, proporcionando información fiable y actualizada para la toma rápida de decisiones.

Para que conozcas esa solución, no complace invitarle a nuestro Webinar con la agenda Agenda:

  1. Bienvenida y introducción
  2. Caso de éxito: departamento de atención al cliente para un gran cliente de telecomunicaciones
  3. Demostración del control de tráfico de llamadas de beneficios: beneficios y funcionalidades
  4. Presentación de la suite sap businessobjects
  5. Turno de preguntas

Asista a la próxima sesión

Lunes, 12 de Diciembre de 2011 - 11:00 a 12:00

Regístrese ahora

Para más información acerca de nuestras soluciones SAP BusinessObjects para departamentos de atención al cliente, visite nuestra web dónde podrá ver un video resumen sobre el Cuadro de Mandos de Tráfico de Llamadas de Clariba.


Saludos cordiales,

Marc Haberland

Director general

Clariba


Webinar - Clariba Traffic Control - Información en tiempo real para Centros de Llamadas


SAP y Clariba le invitan a registrarse en nuestro Webinar de Control de Tráfico de Clariba el diciembre 12 de 11:00 - 12:00 (CET), para aprender más sobre los beneficios de implementar la solución de servicio al cliente en tiempo real. Tenga en cuenta que este seminario se llevará a cabo en español.

Los centros de llamadas y los departamentos de servicio al cliente desempeñan un papel importante en el proceso de ventas y son influyentes en la configuración de la experiencia del cliente. Cuando los volúmenes de llamadas aumentan, los tiempos de espera aumentan o los clientes se vuelven insatisfechos con su experiencia, los gerentes de equipo necesitan una manera de reasignar dinámicamente a los agentes para satisfacer las cargas cambiantes de llamadas y las necesidades de gestión. De actuación, como el reciclaje o los cambios en el proceso.

SAP y Clariba le invitan a inscribirse en el Webinar de Control de Tráfico para aprender más sobre los beneficios de implementar una solución de servicio al cliente en tiempo real. El primer webinar fue muy exitoso, por lo tanto, hemos decidido presentarlo de nuevo en el 12 th de diciembre 2011, de 11:00 - 12:00.

La solución Traffic Control se basa en la pila más integrada de la tecnología SAP BusinessObjects. Es una solución confiable, en tiempo real y llamativa que permite a los Centros de Llamadas ya los Departamentos de Servicio al Cliente mostrar de forma autónoma las métricas clave de tráfico de llamadas. Esto a su vez puede mostrarse en una variedad de dispositivos, desde pantallas grandes a través de la oficina hasta dispositivos móviles portátiles.

El seminario web Traffic Control incluye:

  1. Bienvenida e Introducción
  2. Estudio de caso: Departamento de Call Center para clientes prominentes de Telco
  3. Demo: Beneficios y características del control de tráfico
  4. Herramientas y implementación de SAP BusinessObjects
  5. Q & A

Asista a esta sesión:

Monday 12th diciembre 2011, from 11:00 to 12:00

Regístrate ahora

For more information about our SAP BusinessObjects solutions for Contact Centers, visit our website to view the short 3 minute video about Clariba Traffic Control


Atentamente,

Marc Haberland

Director General

Clariba


Abran paso a SAP HANA

El mes pasado, tuve la oportunidad de asistir al campamento de entrenamiento de SAP HANA en Dubai (Emiratos Árabes Unidos). Esta fue mi primera oportunidad, después de muchas expectativas y whitepapers, de poner mis manos en una verdadera máquina de SAP HANA y la expectativa se cumplieron.

Comencemos con las impresionantes mejoras de hardware que nos han llevado a la revolución informática en memoria.

1
1

No es difícil entender que la parte más lenta de un acceso a la base de datos es la lectura de datos de los discos. Este problema ha sido abordado por los proveedores de bases de datos al intentar utilizar optimizaciones de almacenamiento, hardware más rápido y otras técnicas, pero en última instancia, el sistema de gestión de bases de datos necesita leer los datos del disco. Así que aquí la gran idea vino a jugar ... ¿Qué pasa si puedo almacenar todos los datos en la memoria?

No hace mucho, cuando nuestros procesadores de servidor eran 32 bits, sólo podíamos dirigir 4 GB de memoria, de modo que era la cantidad máxima de memoria que tenemos en frío en nuestro servidor. Hoy en día con las arquitecturas de 64 bits podemos acceder hasta 2 TB.

Además de la gran cantidad de memoria principal que podemos tener en el servidor, gracias a las enormes arquitecturas paralelas (actualmente podemos tener hasta 64 núcleos de CPU por servidor) podemos aplicar muchas optimizaciones que reducen el tamaño de los datos y aumentan Rendimiento de acceso. Estos son:

  • Compresión de datos
  • No es necesario utilizar tablas agregadas que reduzcan los requisitos de almacenamiento de datos.
  • Podemos utilizar particiones de tablas para aumentar la velocidad de acceso a los datos.

Todo esto nos da un tiempo de respuesta cercano a la consulta inmediata, incluso con consultas que involucran billones en filas, y créanme, esto no es sólo un truco de Marketing ... Lo he visto;)

2
2

Hasta ahora hemos visto por qué es interesante usar la informática en memoria y por qué hacerlo ahora, pero, ¿cómo gestionamos SAP HANA Appliance?

El núcleo de la administración de SAP HANA Appliance es SAP HANA Studio. Usando esta herramienta podemos:

  • Modelar nuestra información; Estos modelos se utilizan para crear vistas múltiples de los datos transaccionales.
  • Vista previa de los datos de las tablas físicas y los modelos de información mencionados anteriormente.
  • Importar y exportar datos
  • Configurar el aprovisionamiento de datos (cargas de tabla iniciales y replicación)
  • Administrar la seguridad del sistema

Espero que haya disfrutado de esta visión general de la aplicación SAP HANA. Muy pronto volveré con un post sobre la conectividad de SAP HANA.

Si usted tiene alguna pregunta u opinión sobre el dispositivo SAP HANA, por favor deje un comentario a continuación.

EspañolEnglish