Conditional formatting, as we already know, is a property that allows creating alerts for users, focusing their attention on relevant values appearing on key business metrics.
Unfortunately, this feature is not available for HANA data sources; we needed to find an alternative solution to deal with this issue for our customer. Although the Scorecard component provides a solution, our Clariba of experts have found a low maintenance solution that is scalable and provides better performance. Let us show you how we have achieved this.
The components that we are going to use are:
- Crosstab
- Text
- Rapid Prototyping (part of an extension)
Step 1 – Extension install
We need to install an extension to be able to add the Rapid Prototyping component to Design Studio. This component will allow us to write Javascript to read indicators from the crosstab and apply alerts. You can download the extension HERE
Select the .zip option:

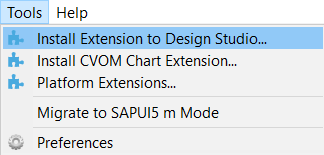
From within Design Studio, select Tools - Install Extension to Design Studio…
Look for the .zip file you just downloaded, and click on OK

Once installed locally, install it in the platform by selecting Tools - Platform Extensions…

Select the extension going to be used: Design Studio SCN Community Prototypes, and click on “Install on Platform”

Close the window; the extension has now been installed.
Step 2 - Development
The first step is preparing the data source. To do so, we must create a column for each one of the measures we want to create an alert for. We will insert an indicator in each column, allowing us to check which kind of alert we are applying on it. For example:
• 1 for those values to be highlighted in RED
• 2 for those values to be highlighted in GREEN
Right after, we create the crosstab pointing to that data source. We must also create a text element where we will show the crosstab name, and finally the Rapid Prototype component. We will end up with these components:

We have to modify the crosstab’s CSS Style in order to hide all columns where alerts are allocated. We do not want these columns to be displayed, but we will need them in the HTML code to retrieve their values. You can find a good explanation on how to format a crosstab in the Clariba Blog article: Formatting Crosstabs
Our JavaScript code will allow us to perform the following tasks:
• Retrieving the table name we want to apply the alert to (defined at the CROSS_ID text component we’ve created before)
• Getting the JS crosstab object using this Name
• Using the JS object, we’ll be able to browse across all crosstab’s child records. Following the fist example, in case the child where the alert is 1, we’ll change the style.color from the indicator to RED. In case the value is 2, we’ll change it to GREEN
See the results below!

Step 3 – Replication
In case we want to apply alerts to more than one crosstab within the same Design Studio document, the task is as easy as doing: set.Text(“Crosstab_Name”) for the created text component (CROSS_ID).
We hope you found this solution useful and achieve the expected results ;)
(Do not hesitate to contact our team for any enquiries!)