""

Movilidad

SAP BusinessObjects Explorer 3.2: Creating Row-Level Security

In the past few months I had the chance to implement a solution based on the combination of SAP BusinessObjects Explorer and mobile devices. The challenge was: “I want to explore the same information that I see on my dashboards with SAP BusinessObjects Explorer on my iPad. In this particular case, some of the customer`s dashboards were really complex and we had to deal with many issues. Today I would like to share with you how we solved one of these issues:

How to implement row-level security into a space of Explorer?

The solution to this challenge cannot be based in any case of security implemented at universe level, in SAP BO Explorer the information of the spaces is retrieved when we index the space, this means that any kind of security applied at universe level will have a direct impact when we index the space. What we needed was a space with all the information but able to be filtered on demand based in some personalization rules.

With SAP BO Explorer 3.2 we are able to generate and apply this kind of security by creating two spaces: one reference space with all the possible information to explore and one personalized, where we will be able to filter the information displayed on demand based on the rules of personalization and making use of the reference space.

Definition of the scenario

To be able to follow the implementation of the solution, assume that we start from:

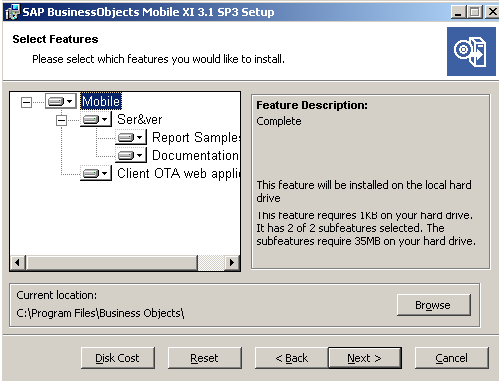
  • SAP BusinessObjects XI 3.1 installed and fully operational
  • SAP BusinessObjects Explorer 3.2 installed and fully operational

To make it easy to follow I will make use of the eFashion universe and we will need to create users in BO according with the list of values of Name of Manager dimension (Store -> Store Details->Name of manager).Note that the name of the users should be exactly the same as the values of the dimension.

We will create a new space based on the eFashion universe information. The personalization rule is that the Store managers will have access to the space but they will only be able to see the information related to their Store(s).

Creating the e-Fashion Reference space

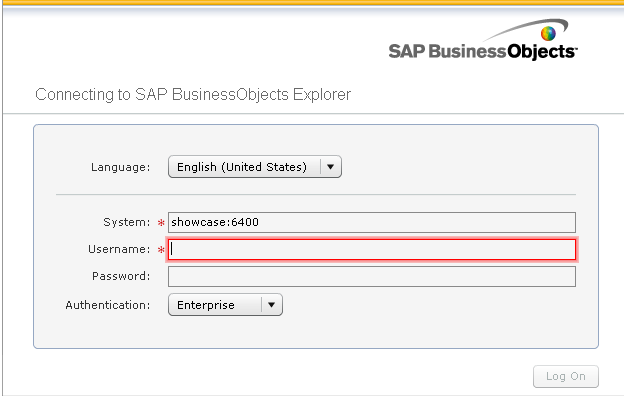
First open SAP BO Explorer and login with administrator credentials. Click in Manage Spaces, select e-Fashion Universe and press New

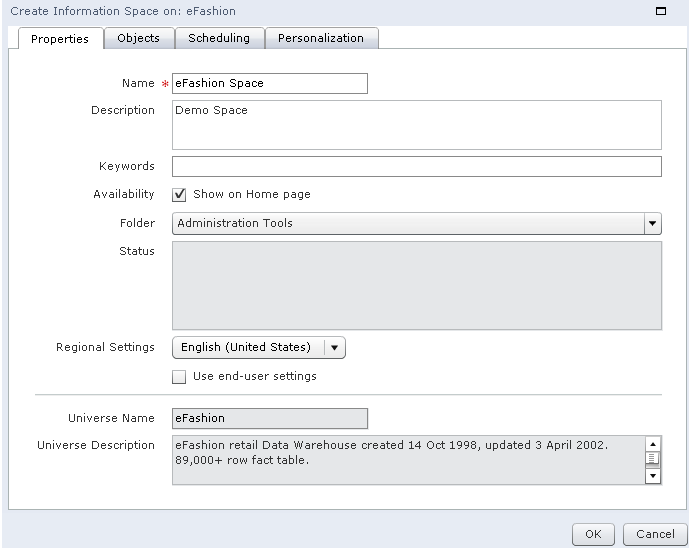
In the tab Properties introduce a Name, in our case eFashion Ref, and select a folder under Public Folders, for the example Public Folders -> Explorer Spaces

The users should not be able to access this space, so remember to uncheck the option Show on Home Page

In the tab Objects select the objects that we will use in the space, in the example this tab will look like this

Then click Validate the space and then OK to save the space

Now you will have to Index the space, to do this just press the Index buttonOnce the status check shows the following symbol the space is successfully indexed.

Creating e-Fashion Personalized Space

Now we will implement the space to be accessed by the users, in this space we will make use of the eFashion Reference space created before to build a space with the personalization rules defined.

Log in with Administration rights into SAP BO Explorer, go to Manage Spaces, select the eFashion universe and press New. In the tab Properties introduce a Name, in our case eFashion Pers, and select a folder under Public Folder, for the example Public Folder -> Explorer Spaces

Select the same objects that we have used to create the eFashion Ref space

Go to tab Personalization, check Personalize information space Exploration and Select the eFashion Ref space from the list Select an information space

Now select User, from the table To Filter, and select Name of the Manager in the drop-down list in the column Filtered By.

We will link the rest of the dimensions of the personalized space with their corresponding ones on the reference space. The Personalization tab should finally look like this:

Validate the space and press Ok to save it and Index the new space eFashion Pers

Security Topics

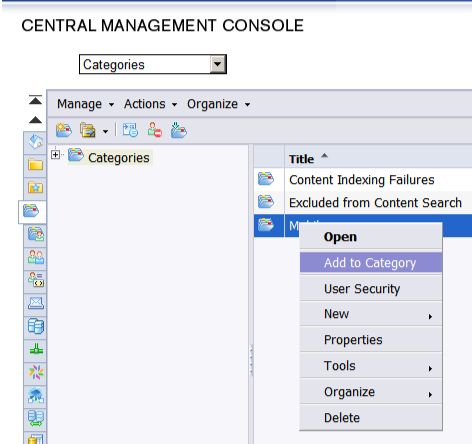
Before testing the solution, and to avoid strange behaviors of the SAP BO Explorer spaces, we will have to review the security applied to the different components involved in SAP BusinessObjects. To “make our lives easier” I suggest creating a User Group (i.e. Explorer Users) in SAP BO and I strongly recommend reviewing this list of topics to ensure that the group has:

  • Granted access to Explorer application
  • Granted access to the Universe
  • Granted access to the Connection used on the universe
  • Granted access to the folder where the spaces will be stored.

In this example, what I did was to grant View On Demand access to all of the items of the list.

Finally the solution is ready to test!

Testing the solution

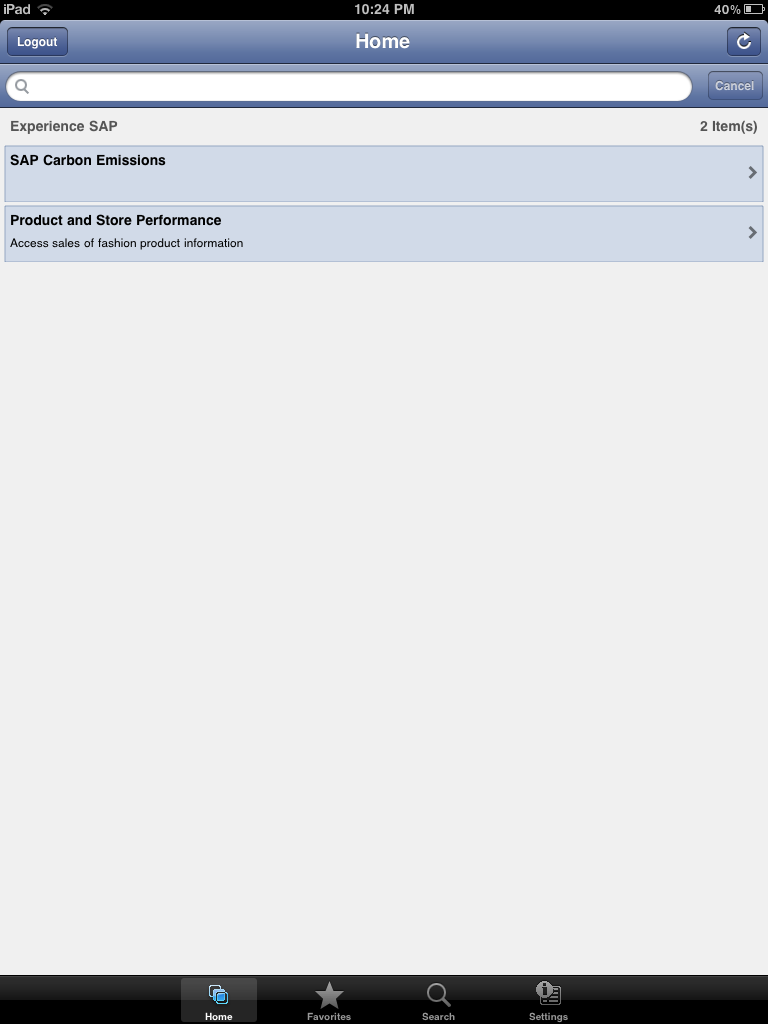
Log on in SAP BO Explorer with one of the users we have created, i.e. Quinn, from the Home tab we will access the eFashion Pers space and see only the data belonging to manager Quinn

If you log on with another user created, i.e. Steve, from the Home tab we will access the eFashion Pers space and see only the data that belongs to Steve

I hope you found this article interesting. For any queries regarding the contents of this article please leave a comment and I will readily reply.

SAP BusinessObjects Mobility Solutions (Parte 2 - SAP BI Mobile)

This is the second article of the SAP Mobility Solution series.  It is time to review the second Mobile application that has been release by SAP Business Objects: SAP BI Mobile

If you have not  read the first article on SAP Explorer yet, check it out.

Just as a brief reminder that both this and the previous tool can be downloaded (if you are an SAP partner) through SAP Marketplace

If you are not an SAP partner but still feel like trying these tools you can still download the mobile applications from the app store and try out the demo servers SAP has made available.

Now let’s start reviewing the second Mobile tool from SAP Business Objects

SAP BI Mobile

The SAP BI Mobile application allows WebI and Crystal reports to be displayed and distributed through Mobile devices. The application we will review here is the Ipad version but other mobile devices are also supported. The Ipad version of this application can only be installed if you have Business Objects XI 3.1 SP3 or higher, so be prepared to patch your system if it is not at this level.

Click Here to find a complete overview of this application.

The first step to get this application running is to install the server side of the software. To do so you need to download two files from the SAP Marketplace: the BI Mobile 3.1 SP3 file and also the BI Mobile SP4 (required for Ipad support)

Instalación

The installation is also straightforward and you should only modify the default settings of the install if your Business Objects system configuration requires it.

For example, if you have a web server separated from the application server then you will have to install those two sides separately (Custom Install). In our example, since all the components are on the same machine we will install all the software on the same place (Complete Install).

You can see in the screen below how components are separated in the install process.

Once you run through the install for the BI Mobile SP3, you will also need to install SP4. This patch installation does not require any configuration and will only write the patched files on the home business objects directory.

After these two installations are complete you will notice new applications are installed on the server components of you Business Objects system.

Run both of the Configure as a service options (only on windows install) so you can also have the BI Mobile components available as services under windows.

Make sure your new Mobile services are started and remember to set them to start automatically in case they need to remain ON along with the Business Objects system.

Deploying Web Components

The web part of the BI Mobile application has also been generated during installation but for some reason they are not automatically deployed (at least in our test cases). Therefore you will need to move them yourself to the Tomcat webapps directory so they are deployed.

Browse to the following directory: $BOBJ_Home/Business Objects 12.0/java/

Locate the following files:

  • MobileBIService.war
  • MobileOTA.war
  • MOBIServer.war

Copy these files to the webapps directory located at: $BOBJ_Home/Tomcat55/webapps

When the .war files are copied to this directory they will be automatically picked up by Tomcat and new directory apps will be created. If the deployment is successful you should be able to access the Mobile default web page at:

http://yourserver:8080/MobileOTA

If a webpage comes on with options for different mobile devices, we are now ready to install/configure the mobile application on the ipad.

La aplicación móvil

First off, we need to download the application from the App Store. You would find it under the name SAP BI Mobile (do not confuse with Mobile One app)

Once downloaded, it is time to configure the settings for a new Mobile connection.  Start the app on the Ipad and click on the Settings option at the bottom.

Select the "add a connection" option where you will have to provide the following:

  • Nombre de la conexión
  • Server URL. This is the name:port of the machine where the BI Mobile web component has been installed (without http in front)
  • The CMS name that controls the BI Mobile server components
  • The Authentication method
  • Nombre de usuario y contraseña

Save the configuration and select the newly created connection.

If the connection is successful we will face the following screen on the Ipad application.

The connection to the mobile server has been successful but we have no reports to show yet. To make new reports available to the mobile application we will have to tag them as mobile compatible. This is done by adding the reports to a category called Mobile. This category can be customized as desired but for this example we will use the default value.

Select the reports we want to make available on the BI Mobile application and categorize them as Mobile.

NOTE: In most cases the category does not previously exist and you might need to create it prior to this step.

Almost immediately after this is done, you will see the categorized reports appear on the lower part of the BI Mobile application.  The reports are now ready to be downloaded to the Ipad.

Click on the green download button that appears next to each report.

When the download is completed the downloaded report will appear on the upper part of the BI Mobile application. We can now click on the report on the upper part and you will find the Mobile version of your WebI/Crystal report.

Be aware that not all WebI capabilities are supported by the BI Mobile version. To understand the limitations you can review the product guide here

On the same document we can also find some useful best practices on how to design a WebI/Crystal report for Mobile viewing and templates that can help you when designing new reports according to mobile devices´ size.

Although the variety of graphs and interaction in the BI Mobile application is still quite basic, we think SAP is in definitely on the right track.

Appendix on Business Objects XI 4.0

Although our example reviews version 3.1 of the Mobile application we also advise to review the guide for release 4.0 as it contains additional features on the BI Mobile application. The additional features include in-table graphics such as percentage bars or sparkline trends. See screenshot below:


Conclusion on SAP BusinessObjects Mobility Solutions

This is a promising start. Chances are that  soon SAP will extend the devices covered, support more complex graphs and take better advantage of the Ipad interaction capabilities as well.

With mobile solutions you will be able to optimize your existing investment by bringing your content to more mediums, you will be able to provide instant answers to more people, no matter where they are working from, therefore, you will boost the performace of your organization. All bets are on mobility!


Si está interesado o ha trabajado con esta aplicación, o si cree que podría ser útil en su organización, por favor deje un comentario a continuación.

SAP BusinessObjects Mobility Solutions (Parte 1 - SAP Explorer)

Como ya habrás notado, vivimos en un mundo móvil. El uso creciente de dispositivos móviles para las tareas cotidianas se ha convertido en un lugar común en el transcurso de la última década. La inteligencia de negocios no se ha quedado atrás en esta tendencia. En esta serie de dos publicaciones de blog sobre soluciones de movilidad de SAP Business Objects, analizaremos las aplicaciones móviles que SAP Business Objects ha puesto a disposición para llevar BI a dispositivos móviles (más concretamente al Ipad): SAP Explorer y SAP BI Mobile.

A través de este análisis aprenderemos cuál es el proceso para instalar las aplicaciones y revisar algunas cosas importantes que debemos considerar. Nos centraremos sólo en su pieza de movilidad (Explorer, por ejemplo, también se puede acceder a dispositivos no móviles) y también revisaremos algunos detalles de la instalación del lado del servidor para cada herramienta.

Ambas herramientas pueden descargarse a través de SAP Marketplace (Si es un socio de SAP).

Si usted no es un socio de SAP pero siente como probar estas herramientas, puede descargar las aplicaciones móviles de la tienda de aplicaciones y probar los servidores de demostración que SAP ha puesto a disposición.

En primer lugar, vamos a darle algunos detalles sobre nuestro entorno de prueba y el software que se instaló en él.

Software:

Business Objects XI 3.1 SP3 Enterprise

  • Sql server 2005

  • Explorador SAP 3.2

  • BI Mobile 3.1 SP4

Hardware (Máquina Virtual):

  • Servidor de ventanas 2003

  • 4 GB RAM

  • 2 procesadores

  • Disco duro de 30 GB

Con la configuración anterior dispuesta vamos a empezar con nuestra primera herramienta móvil de SAP Business Objects.

Explorador SAP

Esta es la primera herramienta de SAP basada en la tecnología en memoria. Está dirigido a usuarios ocasionales que requieren un marco de trabajo ágil y preconstruido para la generación de informes pero que todavía les permite filtrar y buscar datos intuitivamente. Se lanzó inicialmente como una aplicación web sólo, pero las características mencionadas lo convierten en un candidato obvio para dispositivos móviles, por lo que la aplicación móvil salió poco después.

Una vez que haya descargado los archivos del instalador de SAP Marketplace, es hora de instalarlo en nuestro entorno de Business Objects.

Instalación

La instalación de SAP Explorer es bastante sencilla. Usted encontrará que hay muy pocas pantallas que tenemos que prestar mucha atención y estos son los que se centrará en este post.

Debería instalar la aplicación y los componentes del servidor web juntos o separados, dependiendo de la configuración del sistema. En nuestro ejemplo instalaremos todo el producto en una sola máquina.

Para los entornos en los que el servidor web no se encuentra en la misma máquina, tendrá que instalar independientemente el componente de servidor de aplicaciones web en la lista anterior. Sin embargo, también es posible instalar, por ejemplo, el servidor de indexación en una máquina separada para optimizar la eficiencia. El servidor de índices es el encargado de generar el espacio y puede requerir una gran carga de procesamiento dependiendo de su configuración.

Las credenciales del administrador serán necesarias durante la instalación, así que asegúrese de tenerlas a mano, así como el nombre y el puerto del CMS.

Finalmente se pedirá el nombre del nodo. Esto se utiliza para identificar la instalación en la configuración del explorador múltiple / paralelo. Por ejemplo, para vincular un servidor de indexación aislado a su servidor maestro. En nuestro caso dejaremos el nombre del nodo con el nombre por defecto (que en este caso es el nombre del equipo) ya que toda nuestra instalación reside en el mismo lugar.

Once the installation is complete we can test it by accessing the following url: http://yourserver:8080/polestar

Si todo está configurado correctamente verá la pantalla de inicio de sesión para el Explorador.

NOTE: If you would like to review the installation process in more detail it is best to review the Installation Guide also available in the SAP Marketplace.

Creación y configuración de un espacio

El siguiente paso es crear un espacio. El espacio es el dato indexado que el Explorador construye basado en un Universo o Archivo. Para construirlo, tendremos que hacer lo siguiente:

  • Iniciar sesión en SAP explorer

  • Haga clic en la opción Administrar espacios

  • Seleccione un universo

  • Seleccione Nuevo

Proporcionar la información necesaria para construir el espacio. Necesitaremos proporcionar al menos:

  • Nombre del espacio

  • Ubicación de almacenamiento

  • Las dimensiones y hechos que se computarán en el espacio

Una vez que el espacio se ha configurado ahora necesitamos indexarlo. Este proceso se puede ejecutar bajo demanda o se puede programar, como un evento único o recurrente. Dependiendo del tamaño de los datos seleccionados de su universo, este proceso puede tardar de minutos a horas, así que tenga en cuenta esto antes de que las consultas de ejecución larga estén configuradas para crear un espacio. Una vez que el espacio haya terminado de indexar sus datos, se marcará con un cheque verde.

Ahora podemos conectar nuestro dispositivo móvil al espacio!

La aplicación móvil

Antes de conectar tu dispositivo, primero debemos descargar la aplicación desde la tienda de aplicaciones. Lo encontraremos bajo el nombre "SAP Explorer".

Una vez descargado necesitamos configurar una nueva conexión con los siguientes detalles:

  • Nombre de la conexión

  • Nombre del sistema CMS

  • Nombre de usuario (con permisos para utilizar Explorer)

  • Contraseña

  • Tipo de autenticación

No hay requisitos complejos en esta pantalla de configuración. Sólo asegúrese de proporcionar los datos correctos para cada componente (servidor web, cms, cms puerto, etc).

NOTE: the official SAP Explorer Mobile installation guide specifies that installing SAP BI Mobile servers is a requirement. In reality, this is only optional and by installing SAP Explorer server you should be able to access Explorer with your mobile device.

Ahora debe ser capaz de iniciar la conexión con el servidor Explorer y trabajar con el espacio creado antes. En este ejemplo usaremos la conexión de Experiencia de SAP que viene configurada por defecto en la aplicación de Ipad.

Si la conexión es correcta, debe encontrar la siguiente pantalla con todos los espacios disponibles:

Una vez que un espacio se selecciona de la lista que se enfrentan a una pantalla que se parece bastante similar a lo que has visto en la versión web de Explorer.

La versión móvil de SAP Explorer no tiene diferencias en las funcionalidades en contra es la versión basada en Web y sólo se han realizado cambios menores para adaptarse a la interacción táctil en el Ipad.

Como usted ha visto, instalar y preparar SAP Explorer Mobile es una obviedad. Ejecute el proceso de instalación y está configurado para comenzar a utilizar espacios y análisis en memoria en el Ipad.

A partir de ahora no hay otras aplicaciones lanzadas por SAP para otras plataformas móviles (es decir, Android). Algunos podrían decir que esto no es necesario debido a otras plataformas de apoyo de la tecnología flash, pero la capacidad de respuesta de la aplicación de Ipad definitivamente establece esta versión appart. Esperamos ver pronto aplicaciones dedicadas a otros dispositivos móviles.

La próxima aplicación móvil - SAP BI Mobile - se tratará en el siguiente artículo de la serie, que debería estar a principios de enero.

Si está interesado o ha trabajado con esta aplicación, o si cree que podría ser útil en su organización, por favor deje un comentario a continuación.

EspañolEnglish